Authoring Content
Pages and Posts
At their core, WordPress websites are made up of two types of content: pages and posts.
- Pages: Pages are the core content of your website, and typically don’t change often. Your site’s pages tell the biggest parts of your story, serving as hubs to help users find the information that they’re looking for.
-
Post: Posts are streams of content that can change over time, like informing your readers about new ministries or posting new events. Posts appear in lists in a “newest first” order by default. Your custom post types are the different “categories” of post you can create. These include:
- Events
- Ministries
- Stories
- Updates
While your pages are more like the “set it and forget it” cornerstones of your site, you’ll be creating new posts for all of the above items often. Because these posts are categorized, they can also be referenced from other areas and pages—like showcasing a set of stories within a part of another post.
Blocks: the creative power of WordPress
Blocks are the custom, drag-and-droppable visual components that make up your pages and posts. Whiteboard has developed these components using fundamental web design principles to offer an easily configurable way to display your content.
We’ll cover these concepts in more detail in other topics (though if you want to skip ahead feel free to click these links: Post types and Blocks). But first, let’s cover the UI you’ll need to know to create new content using pages, posts, and blocks.
Managing and creating content
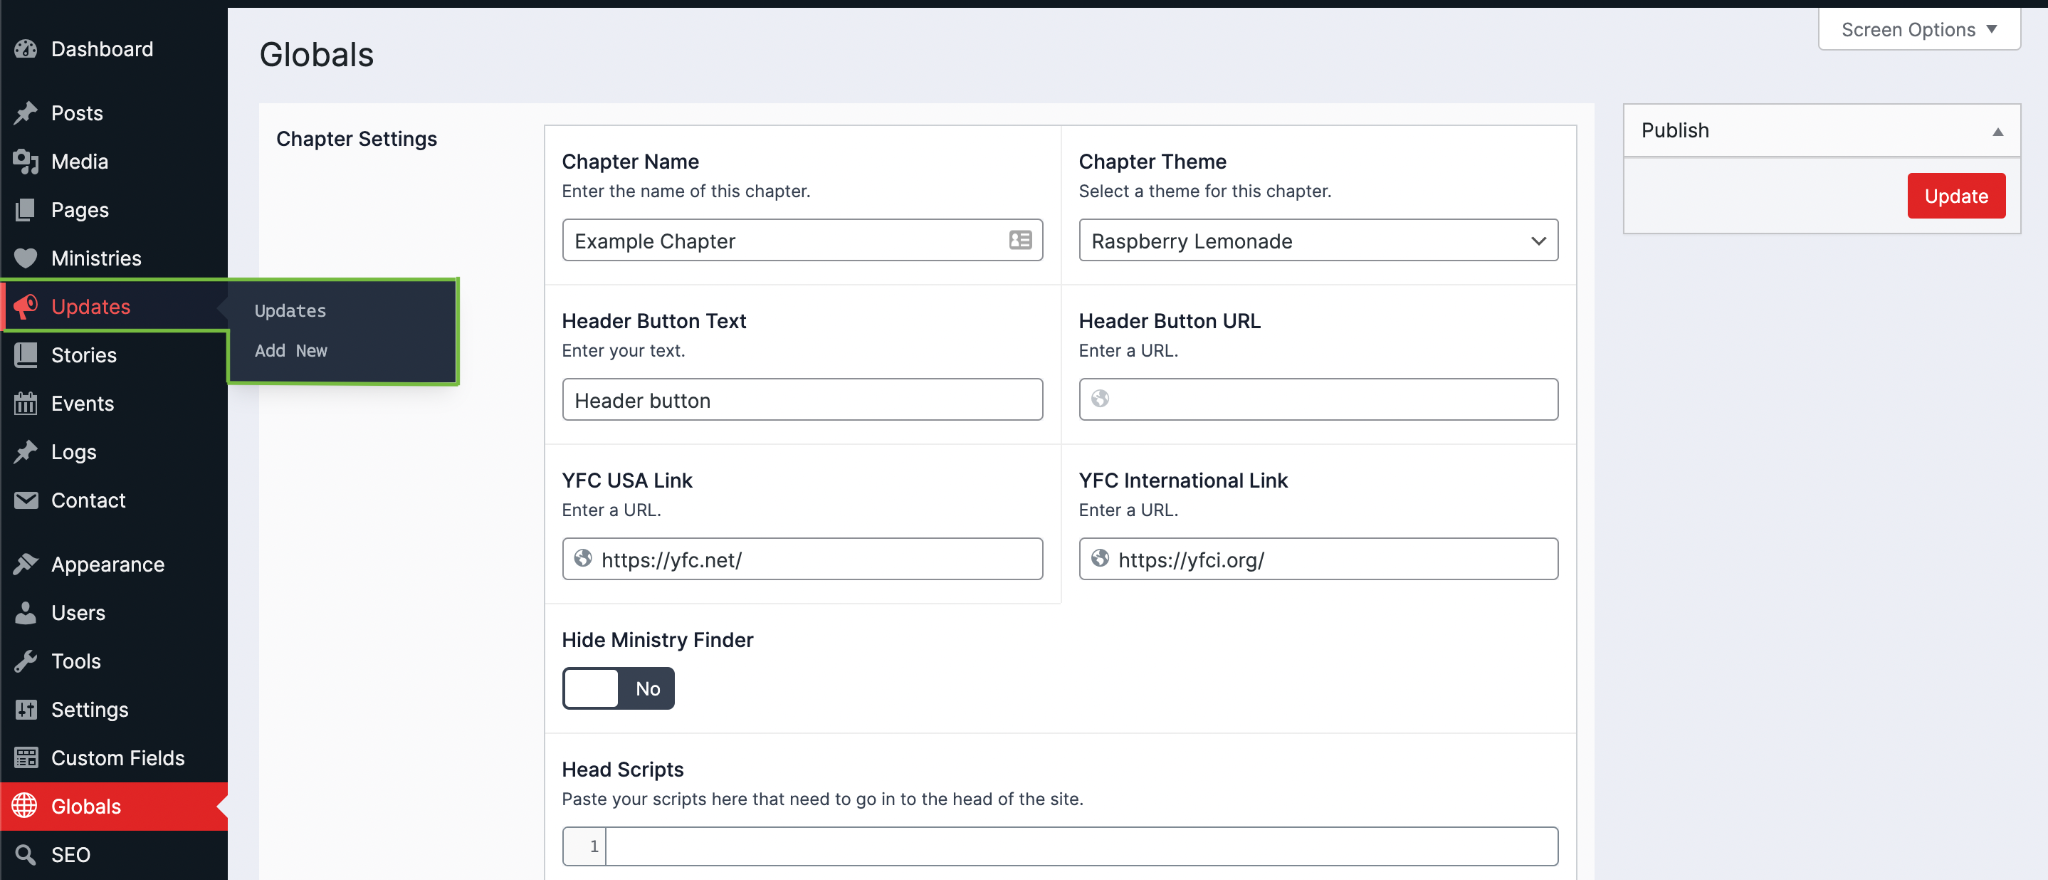
You’ll add and edit pages and posts from your admin dashboard.
Each content label in the left-hand navigation menu shows two options when you hover over them:
- Access this content’s list of entries (For example All Pages or Updates)
- Create a new piece of that content (With text like Add New)
Clicking a content list shows all published content of that type. In the event that your list gets long, WordPress has built in filtering and searching features to quickly find a post or page in each admin view.
On each content view, the most important elements to note are:
- The Add New button: The primary way to create a new piece of content—besides the on-hover shortcut from the sidebar
- The page filters: All, Mine, Published, Draft, Trash. These filters are self-explanatory, but note that when a page is deleted it can be recovered for 30 days (or permanently deleted) only from the Trash filter.
In the content list, each post or page displays a list of actions you can take when you hover over the item. You’ll likely use Edit, Clone, and Trash the most when updating your existing content.
- Edit: This will take you into the page or post editor where you can manage the content for that item.
- Clone: This creates a duplicate draft of an item. This is great if you have a page structure that you’d like to use as a template for a number of pages or posts and don’t want to build from scratch each time.
- Trash: This will send an item to the trash and automatically unpublish. If you need to restore a page from the trash, you can navigate to the trash panel and click Restore. From the trash list, you can also delete pages permanently.
Drafting content
Consider “drafts” as a staging area for preview before publishing to your site. When you create a new piece of content or edit existing content, you’ll be able to manage visibility as you make progress building your page. This can be a powerful feature if you’re drafting content as a team and need to review before publishing.
- You’ll draft your content in the main editor pane. This is where you’ll set basic page information and add blocks. (You’ll learn more about the editor features you’ll use in the Common Editor Elements section below.)
- You’ll save and preview your drafts. We recommend keeping a separate window open on your page and refreshing as you save.
- When you’re ready, you’ll either publish or schedule your content.
That’s the basic flow for creating all of your content boiled into three overly simple steps! So let’s talk about the attributes and buttons that facilitate this.
Each page or post has the following attributes:
- Status: Explains where in the editorial process a piece of content is. Content can be marked as Draft or Pending review. The status auto-updates whenever to Published when published and Scheduled when scheduled.
If a published post is marked as Draft, then it’s taken down from the site. Scheduled posts can be marked as drafts, but they will still be published on their scheduled date. * Visibility: Determines who on the internet can see a piece of content when it’s published:
- Public: The whole internet can see it!
- Password protected: Anyone with the password can see it.
-
Private: Only your site admins can see it.
-
Scheduled for / Publish: This attribute determines when a piece of content is made available on your site.
-
This is a very useful function for lining up future content releases, as content can be published at a specific date and time.
- You can also use this to backdate content. If you set a piece of content’s date too far in the future, and you want to publish it now, set the date to the current time or in the past.
- You’ll also see information about a piece of content’s readability and SEO, courtesy of the Yoast plugin. These attributes are quick previews of the information available in the Yoast plugin block at the bottom of the editor.
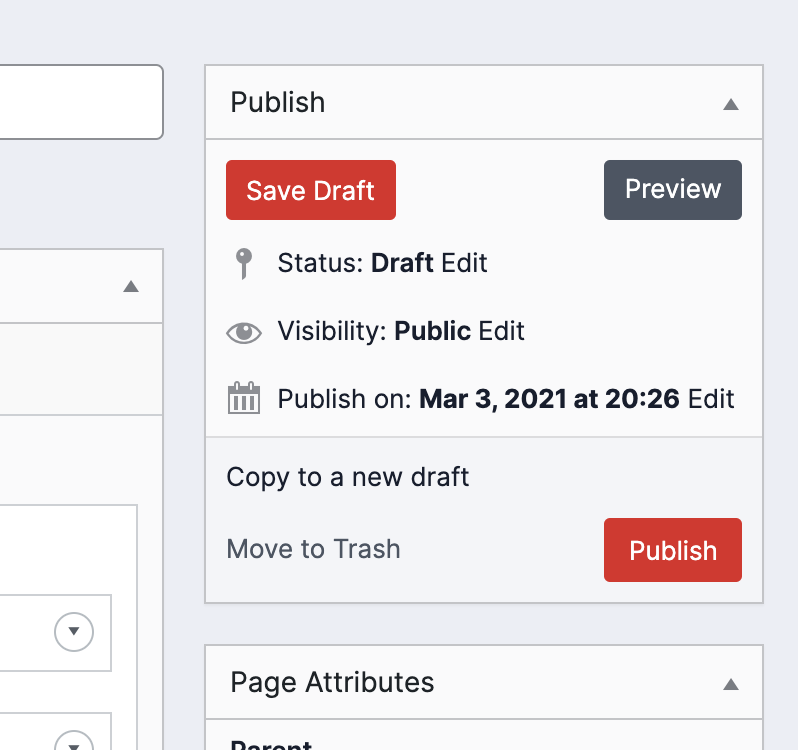
And several buttons:
- Save draft: Only available if a page/post is unpublished. Saves all the changes you’ve made in the editor without publishing them. Saving a draft doesn’t update any existing windows; you'll need to refresh the page to see your changes.
- Preview: Opens the current page or post in a new window, with the latest draft changes reflected.
-
Copy to a new draft: Creates a duplicate of the current content. This is particularly useful if you want to use a page or post as a starting point another, or if you want to make major changes to a piece of content over time while the “published” version stays in place.
-
The Yoast SEO plugin also offers a similar Rewrite & Republish button.
- Move to Trash: Moves the content to the trash—but doesn’t permanently delete it immediately. Trash items are deleted after 30 days, but they can be deleted immediately by going to the content’s list page, clicking Trash, and manually deleting from there.
- Publish/Update/Schedule: Appears as Publish for drafts, Update for published content, and Schedule for scheduled content, this button marks the changes you’ve made in the editor as approved. Unless a post is scheduled for a future date, that means your changes are live.
You can also set a few other options:
- Categories and Tags: A way to organize and categorize your posts. Categories typically are about broader topics (almost like a genre of post) while tags are very targeted and specific (like specific topics). WordPress has great material on these topics available on their WordPress.com support page and their WordPress Support blog.
- Author: Who wrote the content. This can be changed to switch ownership to another admin.
- Featured image: The image to display if the content is referenced from another source—like a block within a post or as a list item on a page.
About URLs
Whenever you first create a page or post, you’ll notice the Permalink attribute updates to reflect that title. This permalink is the actual URL that readers will need to visit to see your content.
Generally you want your URL to match your content’s title. But, if you ever update the title of a piece of content, your permalink will not automatically update. To change the URL for a post or page, click Edit beside the permalink section. This will allow you to change the final part of the URL as you see fit.

The Hero section
Each page begins with a Hero section. Your Hero section is like the book cover of your webpage. It holds the Title Heading that tells readers and search engines what your page is about. We’ve styled the Hero content to take up the full screen when the user first arrives at a page, displaying some text, as well an optional media background and notification element. Be sure to use this space wisely with clear and helpful language and media.
When combined with the Give Overlay or the notification element, they can also be a powerful way to drive users to take action. Here are the properties of the Hero section:
- Label: A small piece of descriptive text, stylized in all caps, that appears just above the hero’s headline.
- Headline: A large piece of header text, stylized in all caps, that appears at the in the center of the hero section.
- Background: The asset appearing behind the text of the hero. Can be either an image or video.
- Slanted Bottom: Determine whether or not there is an angled cutaway from the bottom of the section, providing a dynamic segue into the next section.
- Slant Color: Determines
- Featured Story: Determines whether or not the currently featured story appears as a link in the bottom left portion of the section.
-
Give Overlay: Determines whether or not a large call to action block appears, stretching the full vertical length of the hero section.
-
Note: If the Give Overlay is enabled, then the Featured Story will be hidden. This ensures pages don’t overwhelm the reader with too many content sections.
-
Notification: (Available if the Give Overlay is hidden) Determines whether or not a small notification-esque button appears in the bottom right of the hero section.
-
Users can dismiss this notification or click its button, which navigates them to the link it’s set to.
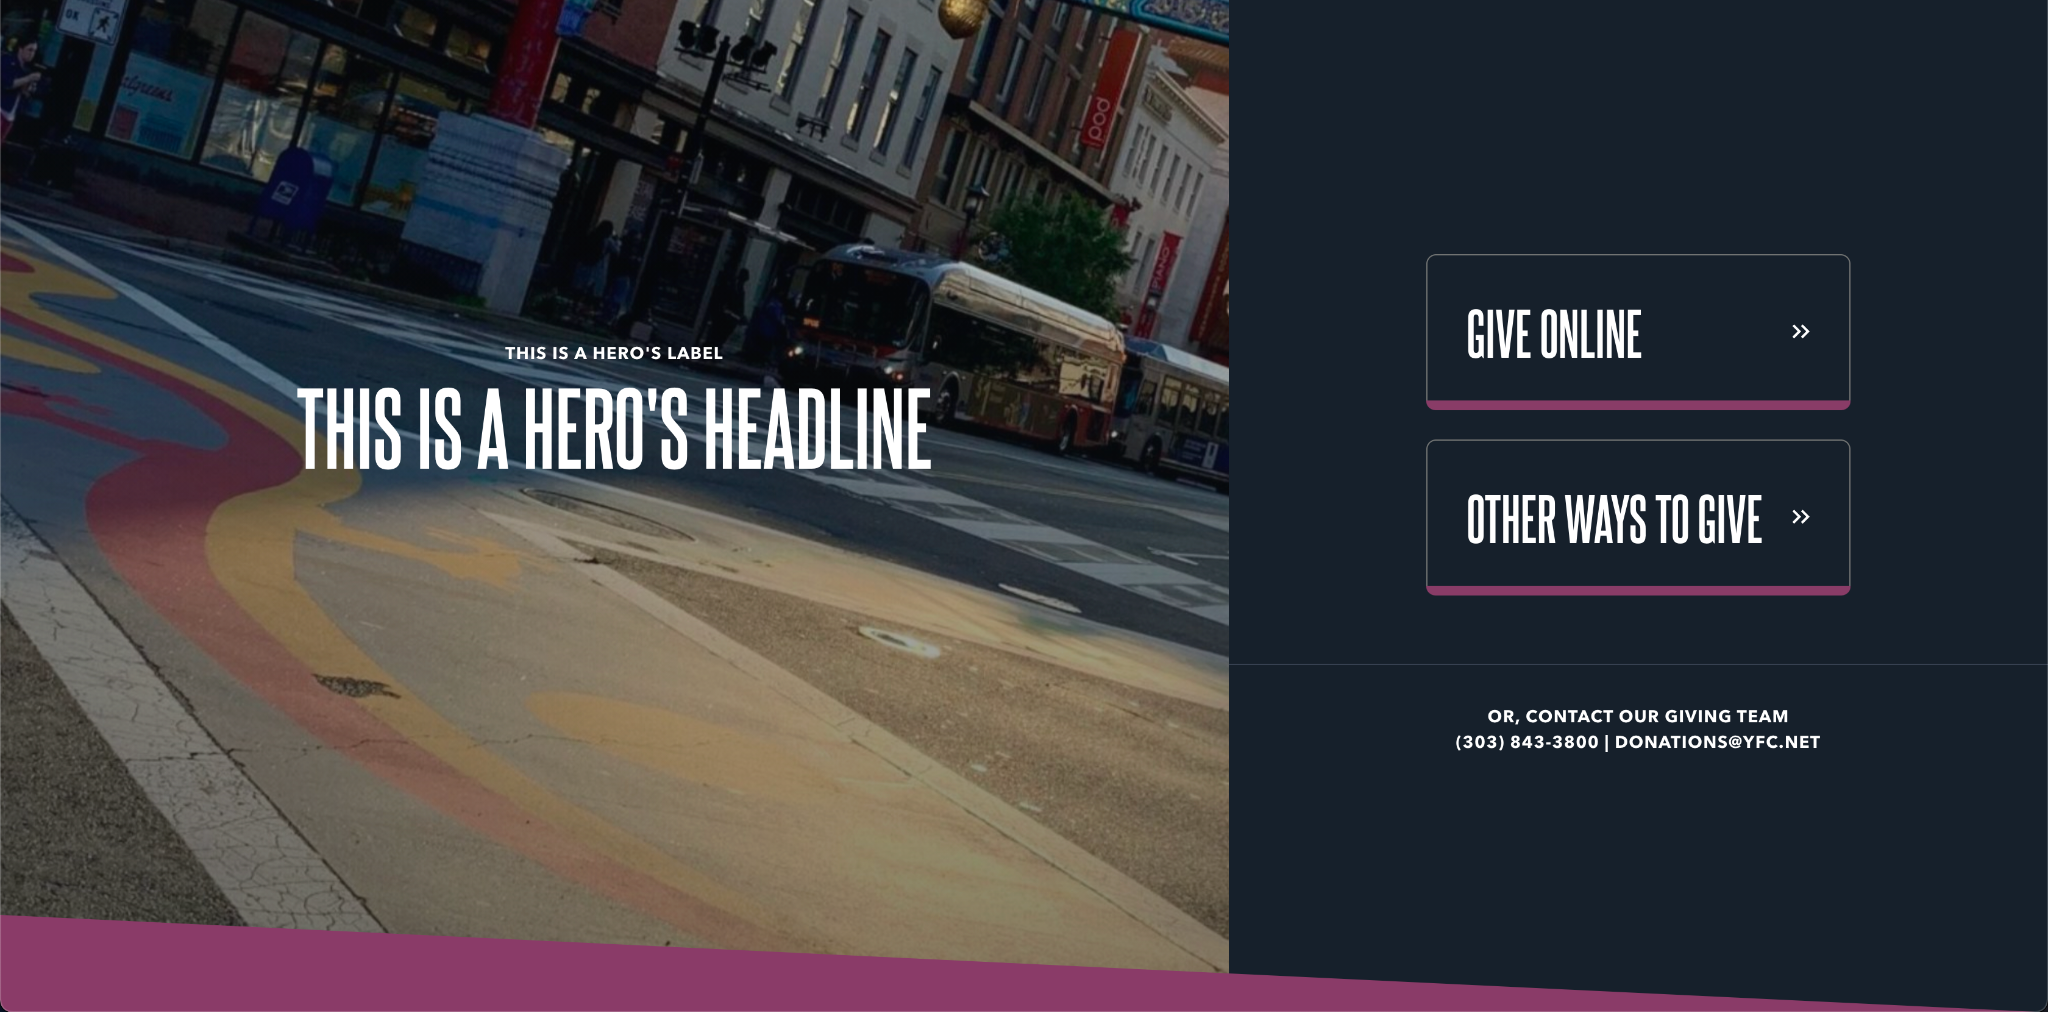
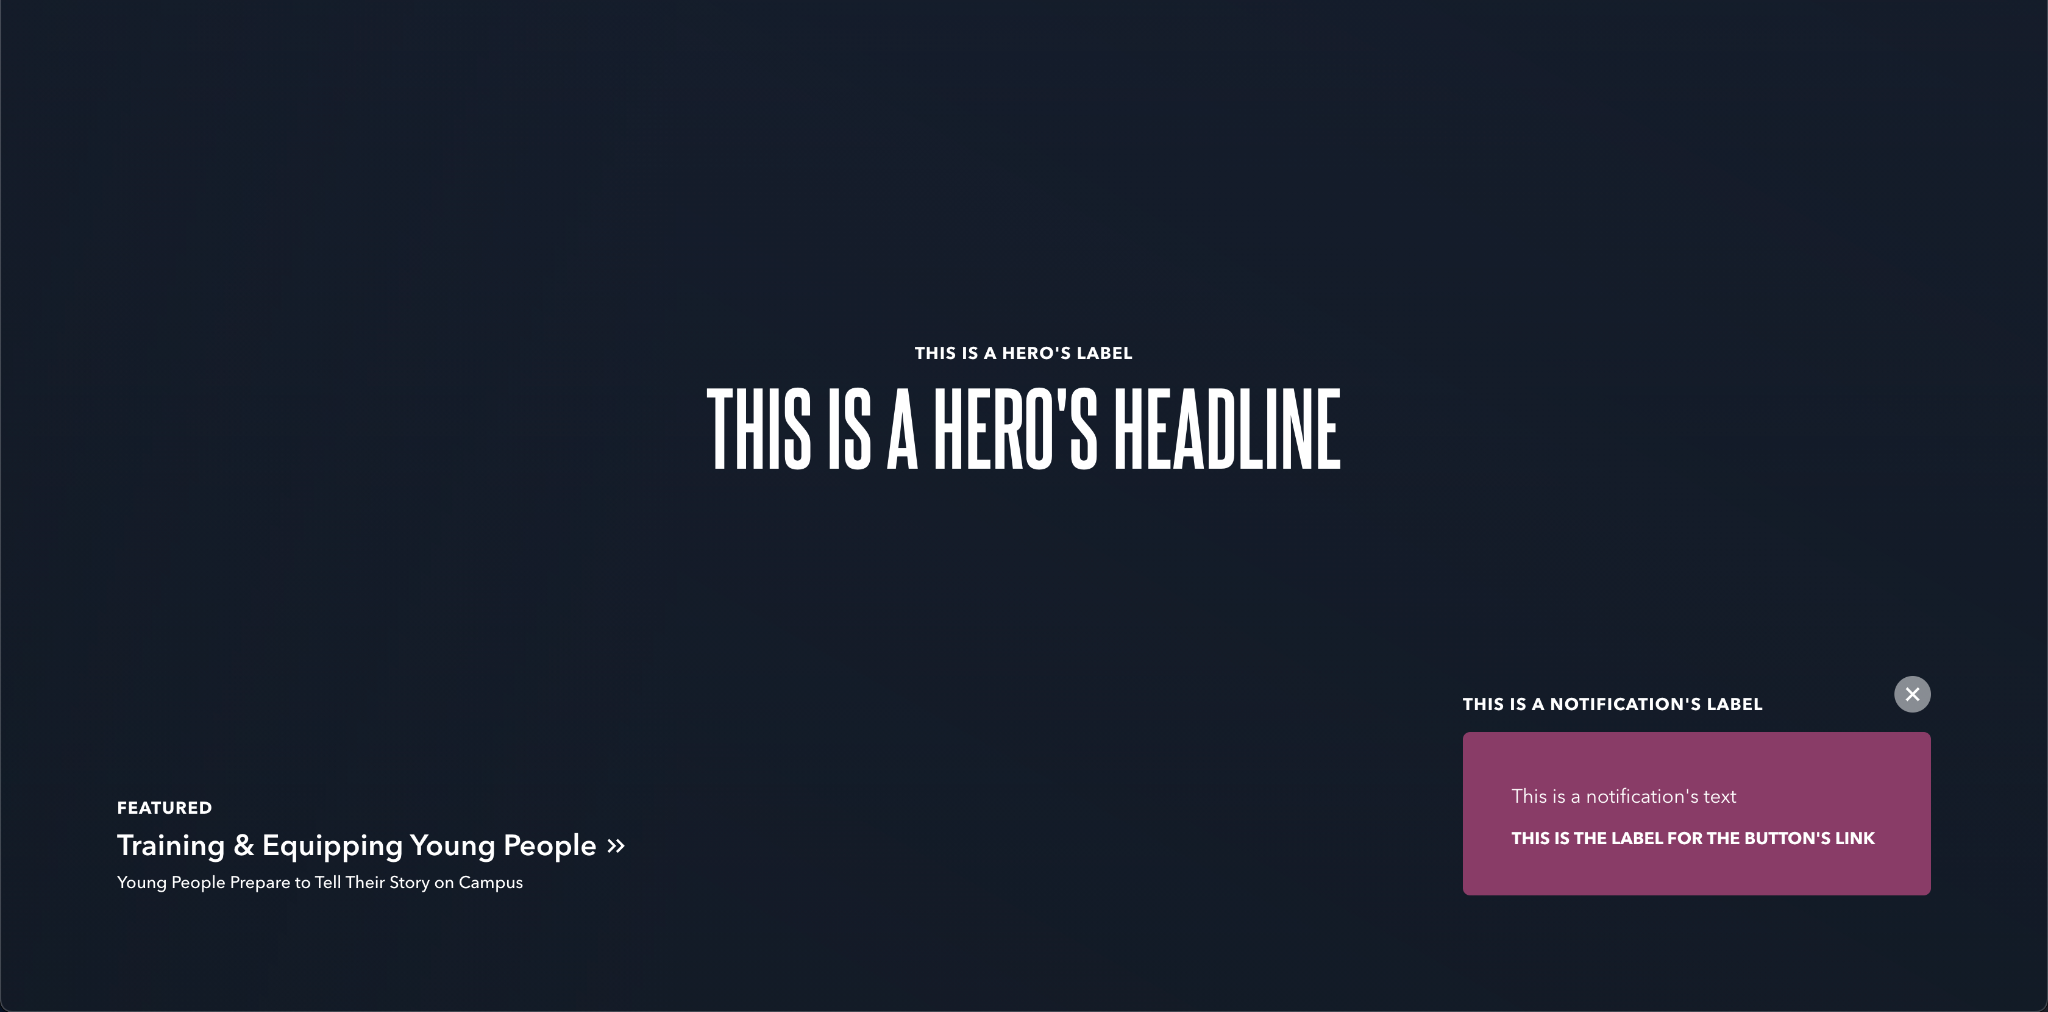
Since they take up so much screen space, it’s important to pick a combination of background and slating options appropriate to your page. Take a look at the examples below.
With no background or slanted options, showing a featured story and notification
With a background and slanted bottom set to slant right with the theme color, showing only the Give Overlay